~*~*~*~*~*~*~*~*~*~
This is a nice little stuff sack for small projects - fully lined & reversible.

I buy these packs of fat quarters at Joann Fabrics - they're nice quilting cotton, usually $9.99... or less if you have a coupon. This pack was $5.99, so the material cost for 4 bags would be $1.50 each.

Divide each of the 5 fat quarters in half along the short axis, and square it up to 18" by 10.5"

You'll have 10 fat eighths (sort of). Sort them until you have 4 pairs of main body pieces that go nicely with 2 accent pieces. Two bags will share one accent piece; the other two bags will share the other. Try different combinations until everything suits you.

Cut each of your accent pieces in 4 along the short axis to get accent panels measuring 4.5" by 10.5". Here we have two body pieces and two accent panels - they'll form one bag. Set all the others aside - your cutting is all done, it's time to sew!

Line up an accent panel on each body piece, right sides together, and sew. I use a 1/4" seam allowance, but I'm not the boss of you - you use what you like. Just be consistent. The little pile of cuttings right there? that was all the scrap from all the bags.

Lay one body + accent piece on top of the other body + accent piece, and sew together to form a loop made of a body piece, then an accent piece, then a body piece, then an accent piece.

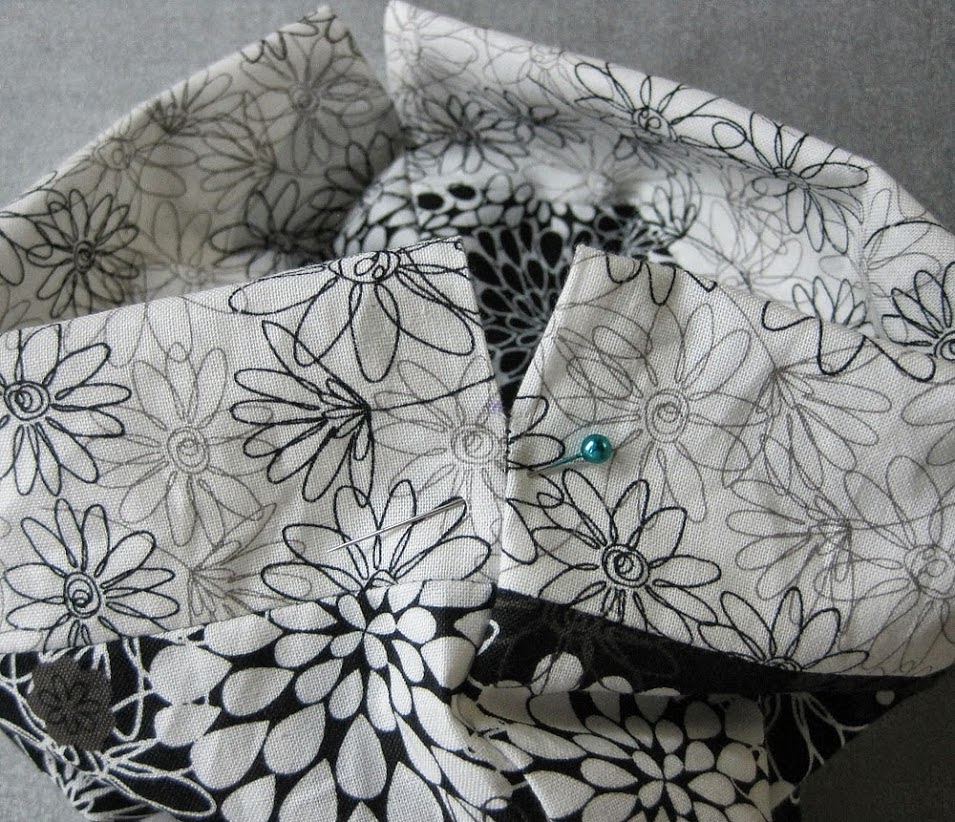
Lay your loop of fabric out with the seams for the accent panels lined up on top of each other. Press the seams flat and pin the sides together so they don't shift.

Find the centre of the short edge of your accent panels, then mark 1" on each side of the centre. This gap will form the drawstring casing - you'll not be sewing the space between these two marks. Mark both sides this same way - you'll have a gap on each side of your bag.

Sew up the side seams from the folds at each end up to the mark for the drawstring casing; backstitch the ends of the seams.

Press the seams flat - this makes it easier to fold the edges in when you do your topstitching later.

Do you like box corners? I like box corners. You don't have to make them if you don't want to. I do it by cutting out a wee square measuring 1.5" on each side. Make sure you measure from the fold and from the SEAM, not the outside edge. Otherwise your box corners will be all wonky (ask me how I know).

Pinch the corner and open out where you cut out the wee square, and fold them the other way with the seam lined up against the middle of the bottom of the bag. Sew this together to make your box corner. Repeat for the other 3 corners.

Turn the whole thing right-side out through one of the side gaps. It'll be fiddly, but it'll all come through the hole, trust me.

This is what you'll end up with. Odd looking business, isn't it? Keep going, you're almost there.

Push one half of the bag down inside the other half.

Line up the bottoms of the drawstring openings and pin them together. Press the top edges of the bag to get a nice crisp fold.
Topstitch all around the accent panel just below the opening for the drawstrings and about 1.4" or so down from the top edge. Backstitch at the ends of the top edges and at the bottom of the gaps. Voila! the drawstring casing is done, and so is the sewing.

Run a pair of twisted cords or ribbons through the casing in opposite directions and knot the ends together. You have a finished bag!

Turn it inside out. Oooo - no exposed seams!

If you use a nice sturdy quilting cotton, you can fold the sides down to form a little yarn bowl.

Finished measurements: about 9" tall and 10" wide. Big enough to hold a ball of sock yarn or other small project.

~*~*~*~*~*~*~*~*~*~*~*~*~*~*~
Thank you for the great tutorial, Ms. Borden!

1 comments:
I want one for my small embroidery projects!! I'm adding it to my wish list for my loving, charming, witty and hilarious daughter to make for me for Christmas, b-day, Halloween, Thanksgiving, Valentine's Day, Mom's Day (oooh, there's a GOOD one!), or any other "day" I deem as necessary to receive a lovely hand-made gift from my girl-seed. hehe Love you tons! p.s. I'm enjoying your new blog. :) Hugs, Mum
Post a Comment