Sunday, August 24, 2014

Site Updates

I know I moved to this site not very long ago, and have had much success with Blogspot, but the needs of my company have changed, and we've had to move again. This blog will stay up for some time, though I cannot give a definitive date as to when it will be taken down. For now, you can still read past posts and make any shop purchases. I will update here one last time when the shop section has made it's transition.

You can access all of this content at www.littlebitfae.com from now on. Please don't forget to update your blog reader/RSS feed! Bug and I still want to carry on our conversation with you!

Wednesday, August 20, 2014

Free Knitting Needle Size Conversion Chart Printable

I like to think that more people are bridging that international gap through G+ hangouts, Ravelry, Sykpe, etc.

Maybe it's just me and my online social circle, I don't know. There are a few folks that I absolutely love to "hangout" with that are not in the US, and this poses a problem when it comes to questions like, "Oh, that's a beautiful pattern, what size needle does it use?"

And then I say whatever US size it takes... and they don't know what the heck I'm talking about because they're on metric. I scoured the internet for a few minutes and found several needle conversion charts, but none of them were pretty, and they all had ads on the pages. I like my work/play space to be pretty, so I made up my own chart and thought that maybe someone else would like to have one handy for all their international knit together needs.

This is my first time offering a free printable, so hopefully I don't screw this up:


If you have any issues downloading or printing the chart, please let me know and I will get them fixed ASAP

Monday, August 18, 2014

Myrtle Sew along

I'm a bit late in posting this because I've been super busy, but a few weeks ago I joined a sew along over on sewalongs.com

Remember the secret new pattern that I posted about? Well, I got an email from the designer's newsletter letting everyone know that there would be a sew along for it, and I went and signed up right away. Unfortunately, it took me a bit longer to get the money for fabric together than I would have liked. (That's always the case isn't it?) So I just got my fabric for it at the end of last week, and I'm almost positive I should have been starting the sewing for it by then.

By the way, how do you write sew along? Is it indeed "sew along" or is it sew a long, or sewalong, or sew-a-long? Ever notice how if you stare at the word "along" long enough it looks wrong?

Anyway, I ended up getting two fabrics. One as the muslin for it, because I've never sewn knit fabric and I'd rather ruin the cheaper of the two first. :p


           This dusty rose has more of an antique look to it in person, but believe it or not, it only cost me about $4 per yard, and when you need three yards, that's a wonderful deal! So, this is my muslin, and here's hoping everything fits wonderfully and I'll have two different colors of this dress.


This is the color I actually ended up choosing. I know that it's not a color I picked before from that post, but I couldn't find any jersey knit in those colors, except the white, and I couldn't decide because green looks fabulous on me! So, I let my husband pick for me. Aren't I nice?

Today I'm going to finally get around to washing my fabric and tracing my pattern pieces, and then cutting them out, while reading the sew along posts so I know what I've got coming.


PS- We got a new kitten on Saturday, and boy does she make writing blog posts difficult!

Bailey Gwyndolynn


Saturday, August 9, 2014

Belated Fiber Friday: Phoenix Fyre

I forgot to make my post yesterday, because the day before my husband brought home a new (to me) desk. Unfortunately, it was all black and I really dislike black furniture, because it makes me depressed and at least for me, gives off that "college dorm" vibe. I've had more than my fair share of the black furniture, because hey, we need furniture, and it's cheap, readily available, and did I mention cheap?

The caveat to that amazing cheapness is that when you move around as much as we do, you're usually having to replace it. It's cheap in quality as well as price.

Anyway. This desk is probably not quite as cheap as the too-many-to-count book cases we've had to replace, but our neighbor is moving to Korea for duty, and his family cannot go with him, so they needed to unload some furniture. LOVE when that happens. :) We got it for a great price, and happened to have a mostly full quart of paint in one of my favorite colors (currently) to decorate with. A quick coat of paint in a dry brush technique... and by quick I mean it took me 6 hours total to get the whole thing painted, not including dry time between some pieces that needed two coats due to the paint beading up.

My new desk!!

So this is what I was doing most of the day yesterday. We got it moved into the house and I had just enough time to relax for about 30 minutes before getting ready to head out for dinner with some new friends, and their adorable, spiky haired three months old daughter. Obviously, it's not most of my stuff put back on it, but you can totally play "what's she working on?" and "spot the kitty."


The real reason you're here, is because of the new yarn. I am progressing into making some smaller dye lot colorways because it's fun. And why put a dye lot indicator on my label if I'm not going to use it?

Phoenix Fyre
Image courtesy of tigerworldent.com


Phoenix Fyre is made in the Puck base, and can be found in the shop here.


Tuesday, July 29, 2014

Finished: Colette Patterns' Meringue Skirt


I finally finished the Meringue Skirt! The muslin took way longer than the actual skirt took. Partially, I think, because I already knew what I was doing the second time, and I wasn't really procrastinating as much on it as I was with the muslin. I'm still trying to figure out what exactly I was afraid of with the muslin.

I know that half of the fun of finished projects is seeing them modeled, but...

I don't have a full length mirror to take selfies in, and I feel really narcissistic asking my husband to take pictures of me.

Alterations: I hacked off two inches in the length because I'm a petite, and I wanted the skirt to fall just above my knees, not below. Overall, I'm happy with the skirt and I wore it right away on a walk around the neighborhood with my husband. I am looking forward to pairing it with a butter yellow top that I have to bring out the yellow in the skirt, but that top is in the wash right now. :)

I should have taken in the waist a couple inches as well, but since I'm really new to this, I didn't feel confident in making that kind of an alteration. So instead of it sitting on my waist like it should, it comes down around my hips, which suits me just fine because that's where I wear my pants. Being a petite, high waisted things on me make me look shorter in the torso. I feel like Urkel. This means that those two inches I took out in the length pretty much mean nothing. In the models, the skirt falls a couple inches above the knee. On me, the bottom of the scallops hit just below my knee. But at least it's not that awkward few-inches-below-the-knee length that looks like it's supposed to be mid-shin but it's not...like it would have been had I not taken out the length.

To me, this skirt looks way bigger than what it is, but honestly, I know I have some body issues. I weigh more than I would like, and my shapes are not where I want them to be, but in my head, my body image is slimmer than what I really am.

The next pattern in the book is the Pastille dress, but if I'm really this big, and I google the dress and see others of my body type that have made it, I'm not happy with the results. I bought a really nice fabric, and I don't want to "waste" it on making something that I'm not going to love, all because I'm bigger than I would like to be.

For the record, this is not me being unhappy with the social standard of what I should look like vs what I really do. This is me being unhappy with the way I look because I know how I have looked in the past...and I want that back. I was a healthy size 4 (off the rack) at one point. I still jiggled in places, so fear not, I was not anorexic. Bacon cheese fries are far too delicious for that. Now, I'm a size 10. I can get into a size 8 pair of petite skinny jeans (I tried this past weekend) and they fit, but they don't make me feel comfortable with myself, and I know that if I were to have sat down in them, I'd have that doughnut tummy going on.

So for now, I'm going to stick to sewing skirts and keep working on my body until it's more where I want it to be. Shopping is great for pulling out your imperfections, especially in ready to wear. Every time I go shopping and am really honest with how clothing falls on me, I get really depressed. This time though, I knew what it was going to be like going into the "experience" and I feel that I'm coming at the issue from a much more mentally healthy standpoint.

I'm almost 100% sure that I have sewing to thank for that. Sewing sizes run much larger than ready to wear. I cut the skirt pattern from a size 14 based on my largest measurement, which is my hips (thanks to two children).

So my whole thing about sewing the entire Colette Patterns book will have to wait. I'm incredibly unfit and lose my breath easily. So while I build up to that, and slim down in the process, skirts it is! ... and loose dresses because Myrtle looks pretty amazing, even on the bigger model!

Shut up, Mom. You know why.

Sunday, July 27, 2014

Fat Quarter Bag Tutorial by Cheri Borden

I was talking with some friends in a G+ hangout about our recent fabric scores, and one of them shared this tutorial from Cheri Borden with me. Cheri is a yarn shop owner (ACME Fibres) up near the Canada/New York state line, and she doesn't know that I'm reposting her tutorial along with all of her pictures. That said, I don't own this tutorial, I didn't help make it, I have nothing to do with it other than wanting to repost it so that when the time comes to make some with my son, I can find it again easily. If you want to see the original tutorial you can find it here.

~*~*~*~*~*~*~*~*~*~

This is a nice little stuff sack for small projects - fully lined & reversible.


I buy these packs of fat quarters at Joann Fabrics - they're nice quilting cotton, usually $9.99... or less if you have a coupon. This pack was $5.99, so the material cost for 4 bags would be $1.50 each.


Divide each of the 5 fat quarters in half along the short axis, and square it up to 18" by 10.5"


You'll have 10 fat eighths (sort of). Sort them until you have 4 pairs of main body pieces that go nicely with 2 accent pieces. Two bags will share one accent piece; the other two bags will share the other. Try different combinations until everything suits you.


Cut each of your accent pieces in 4 along the short axis to get accent panels measuring 4.5" by 10.5". Here we have two body pieces and two accent panels - they'll form one bag. Set all the others aside - your cutting is all done, it's time to sew!


Line up an accent panel on each body piece, right sides together, and sew. I use a 1/4" seam allowance, but I'm not the boss of you - you use what you like. Just be consistent. The little pile of cuttings right there? that was all the scrap from all the bags.


Lay one body + accent piece on top of the other body + accent piece, and sew together to form a loop made of a body piece, then an accent piece, then a body piece, then an accent piece.


Lay your loop of fabric out with the seams for the accent panels lined up on top of each other. Press the seams flat and pin the sides together so they don't shift.

Find the centre of the short edge of your accent panels, then mark 1" on each side of the centre. This gap will form the drawstring casing - you'll not be sewing the space between these two marks. Mark both sides this same way - you'll have a gap on each side of your bag.


Sew up the side seams from the folds at each end up to the mark for the drawstring casing; backstitch the ends of the seams.

Press the seams flat - this makes it easier to fold the edges in when you do your topstitching later.

Do you like box corners? I like box corners. You don't have to make them if you don't want to. I do it by cutting out a wee square measuring 1.5" on each side. Make sure you measure from the fold and from the SEAM, not the outside edge. Otherwise your box corners will be all wonky (ask me how I know).


Pinch the corner and open out where you cut out the wee square, and fold them the other way with the seam lined up against the middle of the bottom of the bag. Sew this together to make your box corner. Repeat for the other 3 corners.


Turn the whole thing right-side out through one of the side gaps. It'll be fiddly, but it'll all come through the hole, trust me.


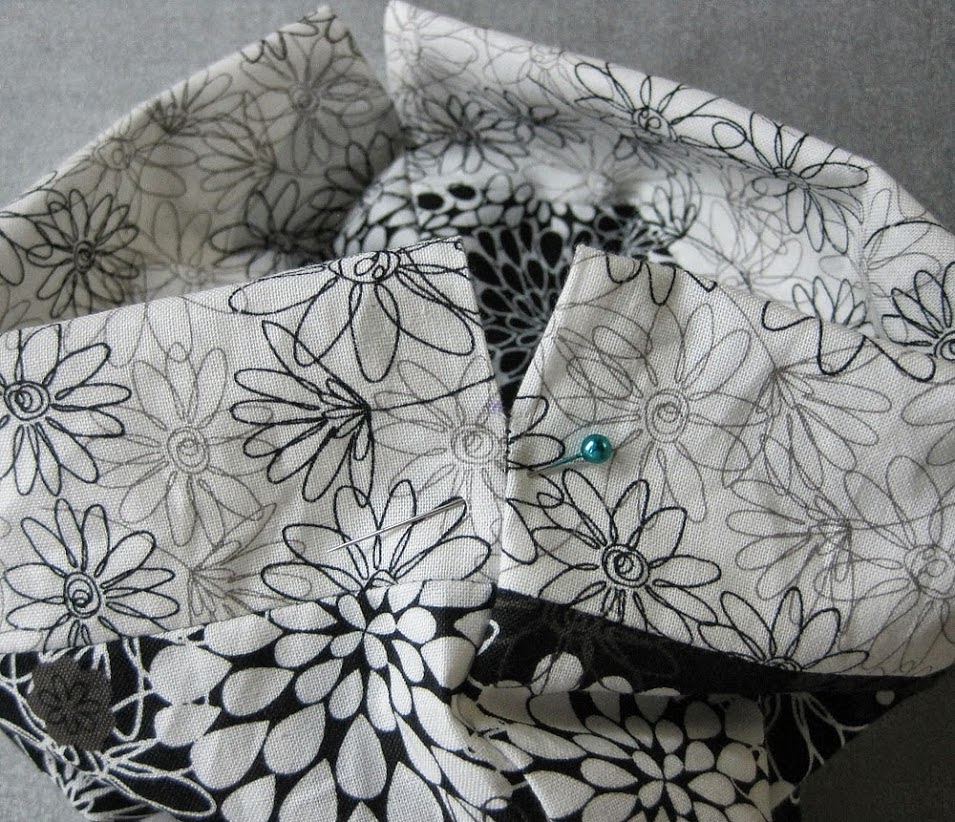
This is what you'll end up with. Odd looking business, isn't it? Keep going, you're almost there.


Push one half of the bag down inside the other half.


Line up the bottoms of the drawstring openings and pin them together. Press the top edges of the bag to get a nice crisp fold.


Topstitch all around the accent panel just below the opening for the drawstrings and about 1.4" or so down from the top edge. Backstitch at the ends of the top edges and at the bottom of the gaps. Voila! the drawstring casing is done, and so is the sewing.


Run a pair of twisted cords or ribbons through the casing in opposite directions and knot the ends together. You have a finished bag!


Turn it inside out. Oooo - no exposed seams!


If you use a nice sturdy quilting cotton, you can fold the sides down to form a little yarn bowl.


Finished measurements: about 9" tall and 10" wide. Big enough to hold a ball of sock yarn or other small project.

~*~*~*~*~*~*~*~*~*~*~*~*~*~*~

Thank you for the great tutorial, Ms. Borden!

Friday, July 25, 2014

Fiber Friday: A Pink/Purple/White Fingering Weight Skein of Gorgeous Yarn: Cheshire

Right now, I can't promise a new colorway every week, but I am Really excited about this one, with a capital R. I kept going back and forth on this one. Do I keep it? Do I see if it sells for X amount of time and then keep it?

In the end, I am trying my best to provide great colorways for you, so that I can buy more yarn from the mill, and make more gorgeous colorways. I worked really hard yesterday on this site and re-arranging furniture in our house to make more room for the ever expanding studio area, so I'm going to keep this short, as I totally rocked it out and earned a fun day.


You can find this skein and others by clicking the link "To the shop!" in the navigation menu.

Meet Cheshire. A pinky purpley mauvey with a hint of brown skein in Puck. While I think Cheshire would be great for some sock, I think he'd make an even better simple shawl to show off his colors. We all know Chesh is a bit of a show off. ;)

Colorway: Cheshire
Weight: Fingering
Yards: 438
Material: 75% Superwash Merino Wool / 25% Nylon
Dye lot: None
Available: 1